XML Interfaces to the Internet of Things with XForms
Steven Pemberton, CWI, Amsterdam, The Netherlands
http://www.cwi.nl/~steven
Abstract
The internet of things is predicated on tiny, cheap, lower power computers
being embedded in devices everywhere. However such tiny devices by definition
have very little memory and computing power available to support user
interfaces or extended servers, and so the user interface needs to be
distributed over the network.
This paper describes techniques using standard technologies based on XML for
creating remote user-interfaces for the Internet of Things.
Contents
Introduction
Moore's Law is alive and well; to use the quote attributed to Mark Twain,
the reports of its death have been greatly exaggerated. This year the 50th
anniversary of Moore's Law was celebrated, which means since Moore's original
paper was published, there have been 33⅓ iterations of the law, which
represents an improvement factor of ten thousand million since 1965.
As an excellent test point of Moore's Law's continuation, in February this
year, almost exactly three years after the announcement of the first version,
version 2 of the Raspberry Pi computer was announced. Moore's Law leads us to
expect that every eighteen months you can get twice as many components per unit
of surface area on an integrated circuit at the same price. (Note that, for
instance, it doesn't say anything about expected clock speeds of computers).
Since three years is exactly two cycles of Moore's Law, does the new Raspberry
Pi deliver a four-fold improvement? Well, it is reportedly six times faster,
has four times as many cores, four times as much memory, and twice as many USB
ports as the original, all for the same price. Moore's Law has apparently done
some pretty good work.
 Moore's Law has three
parameters apart from time: price, size, and number of components. Hold any one
of these constant, and the other two can vary accordingly. So apart from a
Raspberry Pi that is the same price and size, but is better endowed, you can
also reduce the price and size to get a less-powerful but nevertheless
functional computer. This has been observable since the introduction of the
first commercial computers in the 50's: with each order-of-magnitude decrease
in price of computers, a new generation of computers has emerged, that gets
used in a different sort of way. In the 50's you had mainframes that cost of
the order of millions, in the 60's and 70's, minicomputers, of the order of
100,000; in the 70's and 80's, workstations, of the order of 10,000, and then
starting in the early 80's the first home computers and laptops, in the order
of thousands. Now we have netbooks and tablets of the order of hundreds, and an
emerging class of computers, like the Arduino and the Raspberry Pi that cost of
the order of tens (and since we're talking orders of magnitude, it doesn't
matter if we're talking dollars, pounds, or euros, since they are all roughly
of the same value).
Moore's Law has three
parameters apart from time: price, size, and number of components. Hold any one
of these constant, and the other two can vary accordingly. So apart from a
Raspberry Pi that is the same price and size, but is better endowed, you can
also reduce the price and size to get a less-powerful but nevertheless
functional computer. This has been observable since the introduction of the
first commercial computers in the 50's: with each order-of-magnitude decrease
in price of computers, a new generation of computers has emerged, that gets
used in a different sort of way. In the 50's you had mainframes that cost of
the order of millions, in the 60's and 70's, minicomputers, of the order of
100,000; in the 70's and 80's, workstations, of the order of 10,000, and then
starting in the early 80's the first home computers and laptops, in the order
of thousands. Now we have netbooks and tablets of the order of hundreds, and an
emerging class of computers, like the Arduino and the Raspberry Pi that cost of
the order of tens (and since we're talking orders of magnitude, it doesn't
matter if we're talking dollars, pounds, or euros, since they are all roughly
of the same value).
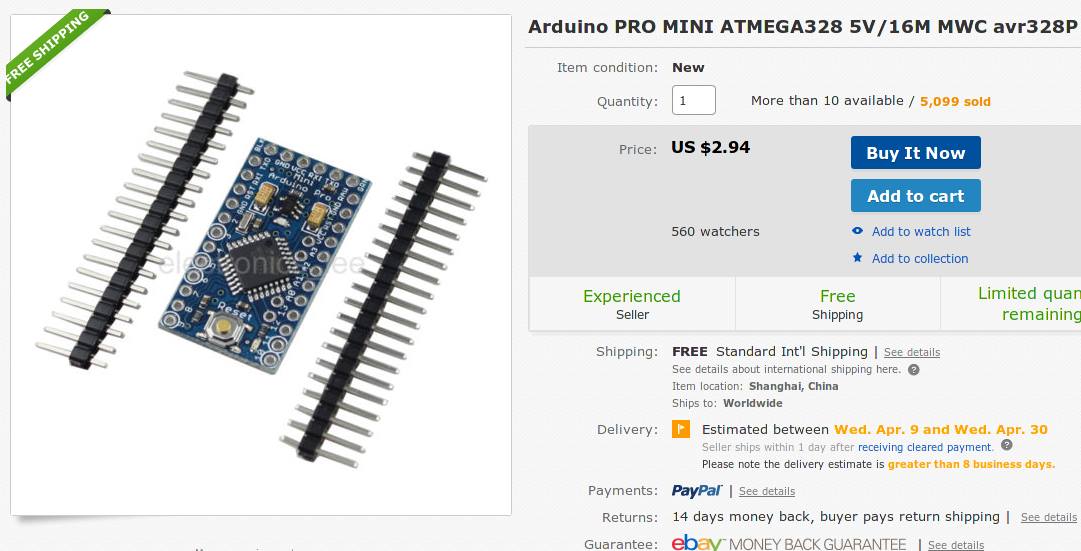
Recently the first computers of the order of one unit of currency have been
appearing, such as the Arduino mini shown in the image.
User Interfaces for Devices
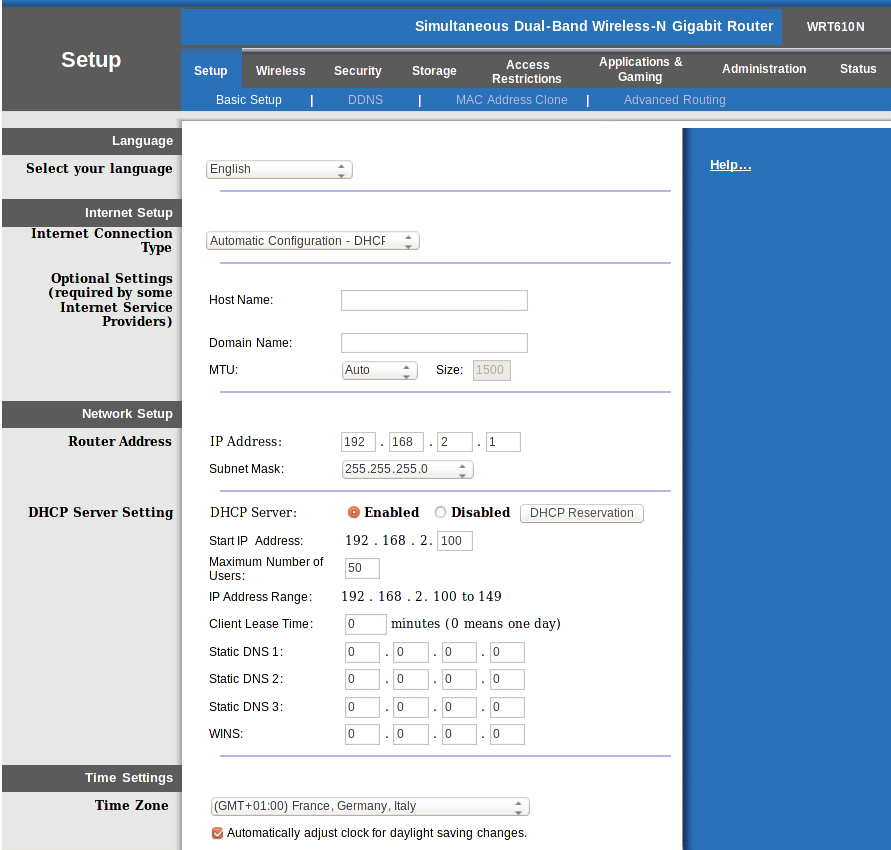 One of the
unanticipated successes of HTML was in its adoption for controlling devices
with embedded computers, such as home wifi routers. To make an adjustment to
such a device, you direct your browser to the IP address the device is running
from, and a small webserver on the device serves up webpages to you, that allow
you to fill in values, and submit them to change the workings of the device.
One of the
unanticipated successes of HTML was in its adoption for controlling devices
with embedded computers, such as home wifi routers. To make an adjustment to
such a device, you direct your browser to the IP address the device is running
from, and a small webserver on the device serves up webpages to you, that allow
you to fill in values, and submit them to change the workings of the device.
However, the form-filling facilities of HTML are rather meager: you can fill
in values, and submit them, but there is little checking possible on the client
side, imposing a duty on the server to check values, and construct error pages
that are sent back to the client asking for values to be corrected should they
be wrong.
However, the tiny computers that are and will be embedded and form part of
the internet of things typically have memory in kilobytes, not megabytes, and
certainly don't have the power to run a webserver that can serve and interpret
webpages; therefore a different approach is called for.
One way is for the devices to serve up just the data of the parameters, and
accept new values for them, so that the values can be injected into a remote
interface served from elsewhere.
XForms
One technology suitable for just such usage, XForms, is a standard developed
at W3C [XForms]. XForms is a technology that was
originally designed for improving the handling of forms on the web. It has two
essential parts. The first part is the model, that specifies details
of the data being collected, where it comes from, its structure, and
constraints; it allows combining data from several sources, and submitting data
to different places.
The second part of XForms is the user interface, that displays
values, and specifies controls for collection, modification, and submission of
the data described, in a device-independent way.
XForms has already been used for a number of years to control devices in
this way at many petrol stations in the USA. Each device, storage tank, petrol
pump, cash register, and so on, contains a simple server that delivers its data
as XML instances. XForms interfaces are then used to read and combine these
values, and update control values (for instance the price of fuel being
displayed on pumps and charged at tills).
Example: A Thermostat
As an example of how it could be used, Nest, a well-known producer of
internet thermostats, has published the data-model interface to its devices [Nest]. A simple interface to this could look like this:
<model>
   <instance id="thermostat" resource=”http://thermostat.local/”/>
   <bind ref="ambient_temperature_c" type="decimal" readonly="true()"/>
   <bind ref="target_temperature_c" type="decimal"/>
   <bind ref="target_temperature_f" type="decimal" calculate="../target_temperature_c*9 div 5+32"/>
   <submission resource="http://thermostat.local/data"method="put" replace="instance"/>
</model>
Here we see an instance that contains the data obtained from the
thermostat, and three binds that assign properties to the data, in
this case types, the property that the ambient temperature value is read-only,
and a calculation that relates the values of the target temperature in
Fahrenheit and Celsius, which ensures that whenever the Celsius value is
changed, the Fahrenheit value automatically changes with it.
The submission element specifies where the data is to be submitted,
and what to do with the reply, in this case that it is data that replaces the
instance values.
A nice feature of this is that even if Nest changes the data structure
returned by the thermostat, as long as the names of the elements used here
remain the same, this interface will continue to work.
Display Values
For a user interface for the thermostat, we need some extra local data
values. In particular we want to offer the user the choice between Fahrenheit
and Celsius in a single control. For this we need to add an extra instance to
the model for the display values:
<instance id="display">
   <data xmlns="">
      <temperature/>
      <target>20</target>
      <scale>C</scale>
   </data>
</instance>
<bind ref="instance('display')/temperature" type="decimal"
      calculate="if(../scale='C', instance('thermostat')/ambient_temperature_c,
                                  instance('thermostat')/ambient_temperature_c * 9 div 5 + 32"/>
<bind ref="target" type="decimal"/>
Here we specify that the displayed temperature is related to the data from
the device, but with a conversion if the user chooses for the Fahrenheit scale.
Similarly, we have to add a relation back to the thermostat instance, so that
the input required temperature is converted to Celsius if necessary:
<bind ref="instance('thermostat')/target_temperature_c"
      calculate="if(instance('display')/scale='C', instance('display')/target,
                   (instance('display')/target - 32)* 5 div 9")/>
The User Interface
XForms controls are specified in a device independent manner, that only
describes what they are meant to achieve (for instance "pick one value
from this list") and not how to do it (using radio buttons, using
drop-downs etc.) This makes it easier to adapt the interface to different
devices, screen sizes, etc., while still allowing the use of specific
interfaces, such as radio buttons, via style sheets. For instance, to specify a
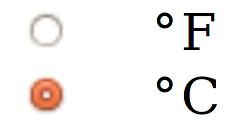
control that allows the user to chose the temperature scale, we specify
<select1 ref="instance('display')/scale" label="Scale">
    <item label="°C" value="C"/>
    <item label="°F" value="F"/>
</select1>
This specification allows several different possible controls, for instance
as a drop-down, or using radio buttons, depending on style-sheet options:

Similarly, the range control specifies an input for a number,
that allows different styling options, such as nudge buttons, a slider, or a
dial; a step attribute specifies the granularity of the
changes:
<range ref="instance('display')/target" step="0.5" start="0" end="30"/>
Of course, these start and end values are in Celsius, and we want to specify
the limits in terms of the scale used. However, any attribute can have a
calculated value, using attribute value templates:
<range ref="instance('display')/target" step="0.5"
       start="{instance('display')/start}" end="{instance('display')/end}"/>
and add these values to the display instance:
<instance id="display">
   <data xmlns="">
      <temperature/>
      <target>20</target>
      <start/>
      <end/>
      <scale>C</scale>
   </data>
</instance>
<bind ref="instance('display')/start" calculate="if(../scale='C', 0, 32"/>
<bind ref="instance('display')/end" calculate="if(../scale='C', 30, 90"/>
Submitting Data
Normally in a form-based interface, there is an explicit [submit] button or
similar that indicates you are ready with the data and want to submit it to be
used.
For instance, in XForms, you would typically have details about where the
data is to be submitted, in the form of a submission element in the model, as
above:
<submission resource="http://thermostat.local/data"
            method="put" replace="instance"/>
This specifies the URL that the data is to be submitted to, the method to be
used (PUT in this case), and what to do with the result. In the case of the
thermostat, the state of the internal values are returned again, and these are
just used to overwrite the values in the instance.
Then in the user interface, there would be a submit control, that initiates
the submission, normally displayed as a clickable button:
<submit label="Submit"/>
However, typically in a direct-manipulation style interface such as a
thermometer, there is no moment that you explicitly submit the data: it just
happens. To effect this in XForms, the submission has to be done automatically.
This can be done by using the standard event mechanism inherited in XForms from
DOM-based systems [DOM events], and using XML Events
[XML Events] to listen for events, and react to
them.
One of the events that XForms generates is the
xforms-value-changed event, which is generated everytime a value
is changed in an instance by a control. There are several ways of specifying
this, but the most direct is to include, as a child of the control, an
action that responds to the event:
<range ref="instance('display')/target" step="0.5"
       start="{instance('display')/start}" end="{instance('display')/end}">
    <action ev:event="xforms-value-changed">
       <send/>
    </action>
</range>
This says that whenever the <range> control receives the
xforms-value-changed event because the bound value has been
changed, then the <send/> action is initiated, which causes
the submission to do its work. When an <action> element only
has one child like this, then it can be contracted:
<range ref="instance('display')/target" step="0.5"
       start="{instance('display')/start}" end="{instance('display')/end}">
       <send ev:event="xforms-value-changed"/>
</range>
Polling
As a result of submitting data as shown above, the thermostat returns the
current values in its internal state, including the currently measured
temperature, which then gets displayed.
Of course, you want to continue to display the current temperature, even if
the user hasn't changed anything via the interface. To achieve this, the data
has to be periodically polled. This can be done also using the event mechanism,
by listening for timing events: at start up you initiate a timer, and then
listen for the event to go off. When it goes off, you respond, and then
re-initiate the timer:
<action ev:event="my-timer">
    <send/>
    <dispatch name="my-timer" delay="20000" targetid="parent"/>
</action>
This <action/> element can go anywhere, as long as its
parent element has id 'parent' (as named in this case) . The delay is specified
in milliseconds, so in this case, every 20 seconds the thermostat is polled for
its current values.
The only other thing that has to be done is to start off the initial timer,
by listening for the xforms-ready event, which is dispatched when
an XForm starts up:
<action ev:event="xforms-ready">
    <dispatch name="my-timer" delay="20000" targetid="parent"/>
</action>
As in the earlier case, this can be shortened:
<dispatch ev:event="xforms-ready" name="my-timer" delay="20000" targetid="parent"/>
Since the xforms-ready event is dispatched to the <model>
element, this <dispatch/> element should be a direct child
of it, and since it doesn't matter where the other action is placed, it can
also be placed there:
<model id="model">
   ...
   <dispatch ev:event="xforms-ready" name="my-timer" delay="20000" targetid="model"/>
   <action ev:event="my-timer">
      <send/>
      <dispatch name="my-timer" delay="20000" targetid="model"/>
   </action>
</model>
Of course, the delay value doesn't have to be hard-wired like this, but can
also be stored in an instance, and accessed from there:
<model id="model">
   ...
   <dispatch ev:event="xforms-ready" name="my-timer" delay="{instance('display')/poll-interval}" targetid="model"/>
   <action ev:event="my-timer">
      <send/>
      <dispatch name="my-timer" delay="{instance('display')/poll-interval}" targetid="model"/>
   </action>
</model>
Repetition
In many applications, there can be a variable number of values for a
particular field; for instance in a router, there can be several rules for
firewall exceptions. Traditionally an interface is used that offers several
blank entries to be filled in. However XForms offers a dynamic control that
grows and shrinks with the number of entries, and allows entries to be added
and deleted:
<repeat ref="firewall/rules" label="Exceptions">
   <output ref="./port" label="Port"/>
   <output ref="./url" label="URL" />
</repeat>
Multilingual Interfaces
Every XForms control has a label. Of course, it is good to be able to offer
an interface in the language of the user. Attribute value templates make this
almost trivially easy: you create an instance to hold the messages and
labels:
<instance id="label" resource="http://example.com/labels-en.xml" />
which can have a structure like:
<labels lang="en">
   <submit>Submit</submit>
   <help>Help</help>
   <scale>Scale</scale>
   ...
</label>
and then reference these in the controls:
<select1 ref="instance('display')/scale" label="{instance('label')/scale}"> ...
Changing the language is then a simple case of having a control that selects
the language wanted:
<select1 ref="instance('lang')/language" label="{instance('label')/language}"> ...
and when an xforms-value-changed happens on this control, the
value chosen can be submitted, and the labels instance replaced with the
returned instance.
These also has the advantage that lables are not hard-wired in the
application, and can be updated on the fly. And of course the languages
available can also be provided by an external instance, so that new languages
can be added on the fly.
Experience
XForms has been used in many projects connecting to devices, including some
very large projects of many person-years. Experience has repeatedly shown that
the time needed to implement such projects is about one tenth of equivalent
projects done using traditional programming methods. This advantage can largely
be ascribed to the declarative nature of XForms, so that much administrative
code that is normally needed in programs is not needed in XForms, since the
system ensures that invariants are kept up to date.
Specifications and implementations
The current official version of XForms is XForms 1.1 [XForms 1.1], though XForms 2.0 is in preparation and close
to completion [XForms 2]. There are several
implementations available, that work both server-side and client-side, both
commercial and open-source. There is a tutorial [Tut] and a
quick reference [QR] available.
References
[DOM Events] T. Pixley, ed., Document Object Model (DOM)
Level 2 Events Specification, W3C, 2000, http://www.w3.org/TR/2000/REC-DOM-Level-2-Events-2000111
[Nest] Nest API Reference, https://developer.nest.com/documentation/api-reference
[QR] Steven Pemberton, XForms 1.1 Quick Reference, W3C, 2010, http://www.w3.org/MarkUp/Forms/2010/xforms11-qr.html
[Tut] Steven Pemberton, XForms for HTML Authors, W3C, 2010, http://www.w3.org/MarkUp/Forms/2010/xforms11-for-html-authors
[XML Events] Shane McCarron et al., XML Events, W3C, 2003, http://www.w3.org/TR/2003/REC-xml-events-20031014/
[XForms] http://www.w3.org/TR/xforms/
[XForms 1.1] John M Boyer (ed.), XForms 1.1, W3C, 2009, http://www.w3.org/TR/2009/REC-xforms-20091020/
[XForms 2] John M. Boyer et al. (eds.), XForms 2.0, W3C, 2015,
http://www.w3.org/MarkUp/Forms/wiki/XForms_2.0